3210 mods help?

  • Thread starter fitz
  • Start date
  • This site may earn a commission from merchant affiliate links like Ebay, Amazon, and others.

PelliX

Well-Known Member
Joined
Jun 16, 2020
Messages
7,225
Reaction score
14,685
So, after one or two hiccups this morning...

The 2SJ49 is a P-channel MOSFET: https://www.alldatasheet.com/datasheet-pdf/view/63100/HITACHI/2SJ49.html

The 2SK134 is an N-channel MOSFET: https://www.alldatasheet.com/datasheet-pdf/view/63172/HITACHI/2SK134.html

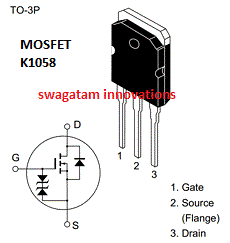
Simply put, they're the same thing, just inverted. The test methods also differ only in that respect. They both share the same pinout: 1 = Gate, 2 = Drain, 3 = Source.

You can think of them as a switch. If voltage is applied to the Gate, the Drain and Source are internally connected. The direction in which the current can flow is opposite between the two types (Negative vs Positive channel, let's say). This comes with a caveat, though; If you measure the Gate with your multimeter, you're applying voltage to the FET and it will even hold that charge for a bit - obviously there's no danger here, but it can screw with your readings. Short the FET first and then check Drain to Source and Source to Drain resistance. Should be extremely practically infinite. If you now check the resistance from the Gate to the Drain and Source - you've charged the FET. NOW, you should get continuity from Drain to Source or Source to Drain (depending on the FET type). Short it again and that 'path' should be an open circuit again.

While there are a lot more expensive options out there, a simple component tester will generally tell you if your FET or transistor is shot.


You can find these on eBay, etc - generally don't cost more than a tenner or two and are well worth it if in doubt. No need to work out the pinouts, either - plug and play. It will tell you the pinout, as it happens. Sometimes, you can run into a component that only breaks down and malfunctions at higher loads and voltages than the tester provides, but this is fairly uncommon, really. Also gives you a low voltage capacitor test which is handy.
 

TassieViking

Well-Known Member
Joined
Jun 20, 2021
Messages
255
Reaction score
268
Location
Under Downunder Where The Devils Roam At Night
You mean Marshall released them like this? I don't think so. This is pretty hacky, sloppy work. They're still tacking a cap on top of a resistor the JTM45 re-issues and while it's a bit ugly, I've never seen this level of disaster soldering from Marshall.
The Issue 2 mod was made in mid 86, this amp is an 87 model so it makes sense they might still have been using the original PCB's without a place for the mod components to fit. While the workmanship looks bad there is always a first amp the new guy gets to do by himself.
If they had new PCB's with the mod but ran out I am sure they would have used the old version PCB's if they still had some laying around.

All apprentices have to learn sometime by practical experience and become better as they go, I have seen worse soldering done by an apprentice, but it should not have been passed by the tradesman supervising him.
I just went with the mod being approved 6 months or more prior the date of this amp, PCB predates the mod but build date the year after the mod is approved.

The transistor component tester in post 41 from Ali express looks just like the one I have been using for 6 years and they work perfectly for most things.
 

PelliX

Well-Known Member
Joined
Jun 16, 2020
Messages
7,225
Reaction score
14,685
While the workmanship looks bad there is always a first amp the new guy gets to do by himself.

Maybe, but to me it looks like the solder was pretty tacky, probably due to either poor solder or insufficient heat on the iron. The apprentice would presumably have had that much guidance as to know better... ah well, doesn't really matter as long as we get it working.

The transistor component tester in post 41 from Ali express looks just like the one I have been using for 6 years and they work perfectly for most things.

I have a couple and @Marcomel79 recently started using one, too. For basic low voltage checks they're great. The big limitation is their voltage for testing cap leakage, but I have an insulation tester for that which happily zaps things at a kilovolt. :)
 

fitz

Well-Known Yinzer
Gold Supporting Member
Joined
Apr 7, 2020
Messages
10,953
Reaction score
32,045
Location
SW PA USA
I hope you ordered them from a reputable place, there are a lot of fake ones out there being sold as the real deal.
Ordered them from ebay - Hitachi branded.
Lots of sellers with the same thing at about the same price.
I watched a few and one sent a free shipping offer, so I just bought those for a few bucks less.

Shipped yesterday - probably another week or so "SpeedPak" from China.
I didn't find anything from a US/UK seller.
Fake?
Are they worth faking?

I pulled the board yesterday to get a look at the back side.
Looks like some heat coloration under those resistors @PelliX had me check out.

back.jpgback2.jpg
 

fitz

Well-Known Yinzer
Gold Supporting Member
Joined
Apr 7, 2020
Messages
10,953
Reaction score
32,045
Location
SW PA USA
I pulled the MOSFETs from the chassis to test them out of the circuit,
Found a written procedure for testing, but after watching about a dozen videos I was reading it with an accent (you know what one...)

The K134 seems ok, but the J49 is showing resistance (not a complete short) between the drain and source, regardless of whether the gate has a charge or not.
Edit: forgot to reverse the probes (polarity) for the P-channel test on the J49 - I think they're both working correctly.

Question is, now what?
 
Last edited:

fitz

Well-Known Yinzer
Gold Supporting Member
Joined
Apr 7, 2020
Messages
10,953
Reaction score
32,045
Location
SW PA USA
I've also ordered (and received) a 10 pack of TL072 op amp chips and sockets if I need to replace IC1, 3. 4 &(or) 5.
 

PelliX

Well-Known Member
Joined
Jun 16, 2020
Messages
7,225
Reaction score
14,685
Fake?
Are they worth faking?

There's some of that, but the cheap stuff less so of course. In hifi setups matched pairs make a difference, though a little imbalance in a MOSFET guitar amp... hey, why not.

Looks like some heat coloration under those resistors @PelliX had me check out.

Ugh, I see. Doesn't look like any damage, but something got toasty. You might want check that the remaining components in that area check out. Mainly looking for shorts, check the resistors and caps. Check the diodes with the continuity test in both directions. If you power the amp on without the FETs (watch the leads of course), same excessive current draw?

I've also ordered (and received) a 10 pack of TL072 op amp chips and sockets if I need to replace IC1, 3. 4 &(or) 5.

Not a bad thing to have spare anyway as they're so ubiquitous. Feel like checking those transistors using the method in the video I linked earlier? Of course it's not foolproof, but let's see if we can identify an easy target.
 

fitz

Well-Known Yinzer
Gold Supporting Member
Joined
Apr 7, 2020
Messages
10,953
Reaction score
32,045
Location
SW PA USA
If you power the amp on without the FETs (watch the leads of course), same excessive current draw?
Put some wire nuts on the MOSFET leads and powered on through the LBL.
Stayed bright for about 5 seconds, so I shut it off.

Feel like checking those transistors using the method in the video I linked earlier?
Check the op amp chips?
I'll have to re-watch the vid.
 

fitz

Well-Known Yinzer
Gold Supporting Member
Joined
Apr 7, 2020
Messages
10,953
Reaction score
32,045
Location
SW PA USA
You might want check that the remaining components in that area check out. Mainly looking for shorts, check the resistors and caps. Check the diodes with the continuity test in both directions.
No shorts - everything seems close to specs like the ones I tested previously.
Nothing on top looks scorched like the spot on the back of the board.
 

PelliX

Well-Known Member
Joined
Jun 16, 2020
Messages
7,225
Reaction score
14,685
Check the op amp chips?

No, sorry, that's on me. I didn't convey most of my thought - it's been a loooong day. What meant was to check the transistors on the board; TR6, 7, 9, 10 and 11. Remind me of the wattage bulb you have in there, 200, right?

Nothing on top looks scorched like the spot on the back of the board.

Agree, nothing looks particularly off.
 

fitz

Well-Known Yinzer
Gold Supporting Member
Joined
Apr 7, 2020
Messages
10,953
Reaction score
32,045
Location
SW PA USA
Re-watching the vid & rechecking...
I think there's something off with TR10 & 11.
Getting large imbalance between emitter & collector, and resistance (base to collector) when reversing the probes.
That should be no continuity, right?
 

PelliX

Well-Known Member
Joined
Jun 16, 2020
Messages
7,225
Reaction score
14,685
Getting large imbalance between emitter & collector, and resistance (base to collector) when reversing the probes.

Hm, TR10 is a BC212 which is a PNP transistor, whereas TR11 is a BC182 NPN so they're "mirrors" of each other. If you're using the methods outlined in the video then you *should* indeed see a low resistance (or diode voltage drop of about 0.5 to 1V) between base and collector and a very high resistance if you reverse the probes. Note that in circuit there can be other things affecting your readings, like a component in parallel - you get the picture, I think. Still the *difference* should be clear on the meter. To be absolutely sure you can remove the transistor, but that's more work and you risk lifting a trace or whatnot (can happen to all of us).

Circling back on this.
Is this about the main transformer?
How / what can I check on that?

Yup, that's where I was going with that. Given the other results, I doubt the transformer is at fault, but let's check it out. :)

To measure the primary side just ensure it has a fuse and is switched on but unplugged. You can then measure the resistance across the AC input hot and neutral wires. It should'nt be too high, less than 1K. Secondary side is actually worth checking out as there's a center tap (see schematic). The resistance between each leg and the center tap should be identical of course. Again, not particularly high (it's a piece of wire after all, just very long and wrapped around, right).

Personally, as a matter of SOP I'd probably check the two filter caps, C48 and 49. If those are leaking or short, it could explain the problem. Always check the DC voltage on them before touching, obviously. Drain if required (they should drain themselves in a few seconds after the amp loses power, but... you know). Check resistance across them in both directions. If you feel like lifting one leg on them to test - even better. IF you go that route, give the amp a quick shot with those caps lifted just to see the power draw.

This is a fascinating lesson.

I'm surprised nobody has stepped in to start lecturing me about the simplifications and inaccuracies I've outlined, haha. There are some handy bits here like transistor checks with a meter and the bridge rectifier/diode checks, etc. Glad you're enjoying it :rofl:
 

fitz

Well-Known Yinzer
Gold Supporting Member
Joined
Apr 7, 2020
Messages
10,953
Reaction score
32,045
Location
SW PA USA
You can then measure the resistance across the AC input hot and neutral wires. It should'nt be too high, less than 1K.
Close to zero?
Switch on, unplugged.
Continuity/diode setting give a beep for a short.
Secondary side is actually worth checking out as there's a center tap (see schematic). The resistance between each leg and the center tap should be identical of course. Again, not particularly high (it's a piece of wire after all, just very long and wrapped around, right).
Same as above - both sides.
 

fitz

Well-Known Yinzer
Gold Supporting Member
Joined
Apr 7, 2020
Messages
10,953
Reaction score
32,045
Location
SW PA USA
Am I doing this right?
Gimme a set DMM on ____, and put probes on ____ & ____.

1725110270152.png
 

PelliX

Well-Known Member
Joined
Jun 16, 2020
Messages
7,225
Reaction score
14,685
Continuity/diode setting give a beep for a short.

The beep is generally just "less than 200 Ohms" (depends a bit on the meter, you should get a reading anyway). Not surprised it's lower - that's typical.

Same as above - both sides.

Cool. I didn't expect an issue there.

Gimme a set DMM on ____, and put probes on ____ & ____.

I think you're doing it right; resistance or continuity (they're the same thing, effectively - just one beeps at you). The blue (neutral) and brown (hot) wire are where the AC enters. Whether you measure that at the plug or on the transformer shouldn't make much more than maybe 5 Ohms of difference. The secondary center tap should be the black and the two reds are the 'legs' of that tap.

Set DMM to resistance and put probes on black and first red. Note reading. Then repeat between the black and the other red. Compare readings. Pretty much identical? Then your transformer is likely not at fault. I doubt there's anything wrong there anyway, but it doesn't hurt to check (well, unless you zap yourself, eh :D)!

My next focus would be the big filter caps. Visually they look fine from what I can tell, but that's merely a indication. If you lift one leg and measure the resistance of one (regardless of polarity/probe orientation) you should get inifinite on the meter. If it's in the kilo Ohm or low mega Ohm range - bad.
 

fitz

Well-Known Yinzer
Gold Supporting Member
Joined
Apr 7, 2020
Messages
10,953
Reaction score
32,045
Location
SW PA USA
If you lift one leg and measure the resistance of one (regardless of polarity/probe orientation) you should get inifinite on the meter
Lifted a leg on both - infinite resistance on both.
 
Top