AVATAR Cabinets and Speakers-What you may not know.

  • Thread starter MartyStrat54
  • Start date
  • This site may earn a commission from merchant affiliate links like Ebay, Amazon, and others.

hbucker

New Member
Joined
Oct 3, 2013
Messages
206
Reaction score
106
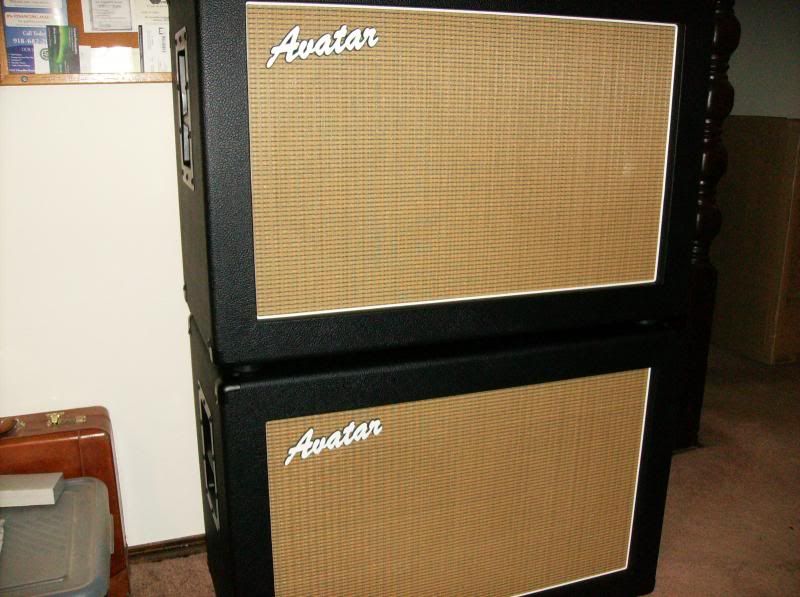
I bought a used Avatar 2x12 Contemporary cabinet loaded with Celestion vintage 30's, in Orange tolex to go with my Orange 30 ADHTC at a local music store for $250. Shop owner obviously didnt know what he had. I couldnt get to the counter fast enough to pay for it... they are great Cabinets ...

This is the kind of deal I dream about, and what keeps me going in to every strange little gear shop I see, just in case. :hmm:
 

MartyStrat54

Well-Known Member
Joined
Feb 21, 2009
Messages
26,014
Reaction score
9,638
Location
Licksville
Just got my pair of Avatar cabs delivered about 30 minutes ago. My first impression is that Avatar doesn't scrimp on the packaging. These cabs came in some industrial strength cardboard boxes. When I did the deal with Dave he said he was going to send me a tee shirt. Well the packing slip says he sent me two of them. That's great. Warmer weather is arriving and it is fast becoming tee shirt weather.

I will post up some pics later today.
 

MartyStrat54

Well-Known Member
Joined
Feb 21, 2009
Messages
26,014
Reaction score
9,638
Location
Licksville
Okay, this is going to be a pic heavy post.

I want to go through the installation process so that newcomers might benefit from it.

First, I will say be prepared to get out a razor knife to cut up all the cardboard. The cabs were packed superbly. There wasn't a blemish or a scuff on either cab.


Some nice SWAG I got from Dave Noss.


Both cabinets stacked and unloaded. I think they are killer looking.


Okay. Some times the back panel is on really tight. This was the case with the Avatar cabs. Not to worry. DO NOT use a flat screwdriver to pry the back panel out. Take a couple of hook screws that are larger than the back panel screws and install them on one end of the back panel. Now you can pull the back panel out without any damage.


The baffle is screwed down and two additional stiffners were added on the top and bottom of the baffle.


Okay, here are some tips. When installing speakers always insure that you start your mounting screws manually. I actually use a screwdriver and take the screws all the way down. Then I use a cordless drill to finish tightening the screws. NOTE: Always use a clutch setting, especially on bigger cordless drills. I have an 18V Ryobi and I set the clutch on 10. ALSO: Do not tighten the screw down until the clutch trips. Snug the screws up in the same manner as tightening the lug nuts on a tire. Once all the screws are snug, then you can drive the screws in until the clutch trips.

You don't want to strip a T Nut and you don't want to warp the speaker basket. Make sure that your Phillips bit is secured in the chuck of the drill. You don't want it to fall out and puncture the speaker cone.

Here are the Eminence CV-75's. NOTE: Mount your speakers so that the terminals are facing each other. After installing the speaker wires, dress your leads with some wire ties and insure that the wires are not touching the basket or the speaker cone.


Here are the Legend 1275's.


VERY IMPORTANT: Always check your impedance (Ohms) before screwing the back panel down. In this case, I am using two 8 ohm speakers wired in series for a 16 ohm load. The DCR reading was 14.5 for the CV-75's and 14.7 for the Legend 1275's.


Back Panels


Loaded and ready for my RCA AFD amp from GR Amplification. I should be getting it in about 2-3 weeks.

waitingonPTfrontview_zps81768e73.jpg


021_zps10d543d0.jpg
 
Last edited:

Marshall Stack

Well-Known Member
Joined
Apr 15, 2011
Messages
3,576
Reaction score
5,961
Location
St. Louis, Mo.
I have a question regarding an existing Avatar cabinet that I have had for awhile. I bought it off CL and it is an older 4x12 cabinet with metal grill front and an ozite type covering.

The cabinet came with Eminence Legends (V30 clones) which I ended putting in a home made cabinet. I took the speakers from that cabinet (horrible Celestion Modern Leads) and put them in the Avatar. I haven't used the Avatar cabinet since the shallow depth combined with the Modern Leads make for a extremely bright cabinet. Should I just punt and try to sell it as-is or would it be worth it to try and replace two of the speakers in a cross pattern? I really don't want to have to purchase four speakers.
 

Adrian R

Well-Known Member
Joined
Jan 28, 2009
Messages
7,543
Reaction score
7,292
Location
Far North Chicago Burbs'
I've dealt with this company before and their totally pro..

Dave is a first class guy.

Best thing is that all of these high quality cabinets are made right here in the U.S., AND at reasonable prices...

Quality and affordability made in the U.S. is a scarce commodity these days!
 

Adrian R

Well-Known Member
Joined
Jan 28, 2009
Messages
7,543
Reaction score
7,292
Location
Far North Chicago Burbs'
Okay, this is going to be a pic heavy post.

I want to go through the installation process so that newcomers might benefit from it.

First, I will say be prepared to get out a razor knife to cut up all the cardboard. The cabs were packed superbly. There wasn't a blemish or a scuff on either cab.


Some nice SWAG I got from Dave Noss.


Both cabinets stacked and unloaded. I think they are killer looking.


Okay. Some times the back panel is on really tight. This was the case with the Avatar cabs. Not to worry. DO NOT use a flat screwdriver to pry the back panel out. Take a couple of hook screws that are larger than the back panel screws and install them on one end of the back panel. Now you can pull the back panel out without any damage.


The baffle is screwed down and two additional stiffners were added on the top and bottom of the baffle.


Okay, here are some tips. When installing speakers always insure that you start your mounting screws manually. I actually use a screwdriver and take the screws all the way down. Then I use a cordless drill to finish tightening the screws. NOTE: Always use a clutch setting, especially on bigger cordless drills. I have an 18V Ryobi and I set the clutch on 10. ALSO: Do not tighten the screw down until the clutch trips. Snug the screws up in the same manner as tightening the lug nuts on a tire. Once all the screws are snug, then you can drive the screws in until the clutch trips.

You don't want to strip a T Nut and you don't want to warp the speaker basket. Make sure that your Phillips bit is secured in the chuck of the drill. You don't want it to fall out and puncture the speaker cone.

Here are the Eminence CV-75's. NOTE: Mount your speakers so that the terminals are facing each other. After installing the speaker wires, dress your leads with some wire ties and insure that the wires are not touching the basket or the speaker cone.


Here are the Legend 1275's.


VERY IMPORTANT: Always check your impedance (Ohms) before screwing the back panel down. In this case, I am using two 8 ohm speakers wired in series for a 16 ohm load. The DCR reading was 14.5 for the CV-75's and 14.7 for the Legend 1275's.


Back Panels


Loaded and ready for my RCA AFD amp from GR Amplification. I should be getting it in about 2-3 weeks.

waitingonPTfrontview_zps81768e73.jpg


021_zps10d543d0.jpg

Kick-ass post Marty man...:cool:
 

Karloff

Active Member
Joined
Dec 4, 2012
Messages
144
Reaction score
87
Location
Eastern Shore of Maryland
This is the kind of deal I dream about, and what keeps me going in to every strange little gear shop I see, just in case. :hmm:

I have gotten lucky a few times with deals like that. Got my orange head used for $600, perfect condition. got a Traynor YCS50 combo used/perfect cond. for $350. They are $980 new...

Seeing Martys pics has got me jonesin' for another Avatar. they look so good stacked like that.
 

MartyStrat54

Well-Known Member
Joined
Feb 21, 2009
Messages
26,014
Reaction score
9,638
Location
Licksville
@ MartyStrat54

damn that looks great. you're gonna love how the contemporary cab sounds. deep and full.

Well I calculated the inside dimensions and each speaker is seeing 2.25 cubic feet of volume. That should really make some bottom end. If they are too boomy I'll put in some white insulation.

It will be cool to see how each cab sounds on its own with the different speakers.

The Legend 1275's are rated at 101.1dB each and the CV-75's are 102.2dB. That's gonna be one loud mudda fugger.
 

ibmorjamn

Well-Known Member
Joined
Nov 3, 2012
Messages
11,548
Reaction score
12,260
Location
North
You know , I hate when gas gets relieved and then you get more gas for a cab.
Mesa Single recto in a month (love lay away) And so oversize mesa type cab would be nice.

I did see the carvin legacy has 2 vintage 30's I believe but I'm not sure on their dimensions of either cab.
 

ibmorjamn

Well-Known Member
Joined
Nov 3, 2012
Messages
11,548
Reaction score
12,260
Location
North
Kick-ass post Marty man...:cool:

Okay, this is going to be a pic heavy post.

I want to go through the installation process so that newcomers might benefit from it.

First, I will say be prepared to get out a razor knife to cut up all the cardboard. The cabs were packed superbly. There wasn't a blemish or a scuff on either cab.


Some nice SWAG I got from Dave Noss.


Both cabinets stacked and unloaded. I think they are killer looking.


Okay. Some times the back panel is on really tight. This was the case with the Avatar cabs. Not to worry. DO NOT use a flat screwdriver to pry the back panel out. Take a couple of hook screws that are larger than the back panel screws and install them on one end of the back panel. Now you can pull the back panel out without any damage.


The baffle is screwed down and two additional stiffners were added on the top and bottom of the baffle.


Okay, here are some tips. When installing speakers always insure that you start your mounting screws manually. I actually use a screwdriver and take the screws all the way down. Then I use a cordless drill to finish tightening the screws. NOTE: Always use a clutch setting, especially on bigger cordless drills. I have an 18V Ryobi and I set the clutch on 10. ALSO: Do not tighten the screw down until the clutch trips. Snug the screws up in the same manner as tightening the lug nuts on a tire. Once all the screws are snug, then you can drive the screws in until the clutch trips.

You don't want to strip a T Nut and you don't want to warp the speaker basket. Make sure that your Phillips bit is secured in the chuck of the drill. You don't want it to fall out and puncture the speaker cone.

Here are the Eminence CV-75's. NOTE: Mount your speakers so that the terminals are facing each other. After installing the speaker wires, dress your leads with some wire ties and insure that the wires are not touching the basket or the speaker cone.


Here are the Legend 1275's.


VERY IMPORTANT: Always check your impedance (Ohms) before screwing the back panel down. In this case, I am using two 8 ohm speakers wired in series for a 16 ohm load. The DCR reading was 14.5 for the CV-75's and 14.7 for the Legend 1275's.


Back Panels


Loaded and ready for my RCA AFD amp from GR Amplification. I should be getting it in about 2-3 weeks.

waitingonPTfrontview_zps81768e73.jpg


021_zps10d543d0.jpg
Marty , that is jaw dropping awesome !:yesway:

Happy or you on how the cabinets came out!! THey look nasty!
I must have missed the details on the amp build here somewhere !
 

Frankie

Well-Known Member
Joined
Sep 8, 2007
Messages
6,837
Reaction score
3,721
Location
Tampa, FL
I've done business with Dave before and he's good people. He got me simply THE best price on some UK Celestion Blues for my AC30 and shipped them out to me super quick. That's the only place I'll go now to buy new Celestions. Never tried one of their cabinets, but from everything I've heard they're really solid and the prices can't be denied.
 
Joined
Sep 21, 2008
Messages
77
Reaction score
30
Location
Seattle, WA, USA, Earth
After looking at Avatar stuff for years I finally pulled the trigger this past Christmas on an Avatar 18W head and matching 2x12" Contemporary cab special. Dave was doing an insane Christmas time deal where the cab was $388 loaded with UK Heritage Greenbacks and free shipping. No choice in color, just black tolex with the wheat grill like Marty's pics, but for the price I couldn't pass it up. Personally I think the Contemporary cabs are just a bit too big, but for the price and awesome build quality you can't go wrong.

And like everyone else has said, Dave is easy to deal with and usually answers emails within a few hours. They accidentally sent me the wrong cab cover and Dave apologized and sent me a new one the next day, and let me keep the other one. You just don't get this kind of personal service with quality items handcrafted in the USA for this kind of prices anymore.
 

sinner 13

Well-Known Member
Joined
Sep 11, 2011
Messages
1,883
Reaction score
1,653
Location
Cradle Of Liberty.
VERY IMPORTANT: Always check your impedance (Ohms) before screwing the back panel down. In this case, I am using two 8 ohm speakers wired in series for a 16 ohm load. The DCR reading was 14.5 for the CV-75's and 14.7 for the Legend 1275's..

Ok cool, I was gonna ask about this in another thread, but you answered for me, I recently rewired my cab (4 16 ohm 10's) from 4 to 16 ohms, and it read at about 14.6-14.8.

Plus you have the same multi I do, so I know now it is not the tools....

Congrats man, I Love mine, and will reccomend these guys to anyone.

Price Vs. Quality that CANNOT be beat, and I CAN"T WAIT to hear your crazy assed amp thats going with them!

those being closed backed, are gonna be face melters....
 
Top