Hello again, everyone!
After seeing several posts about shielding your guitar and the various methods involved (as well as being asked directly to contribute my methods), I thought I’d share a step-by-step detailed analysis of how I perform this job in my shop. My way is NOT the only way to do this job - it’s just the method that I personally use and has worked best for me as I developed it over time. Recently, I was given a noisy mongrel guitar (based on a Fender Jaguar…sort of) that had two AWESOME sounding P-90 pickups in it but was excessively noisy. Time for a shielding job!
For your collective consideration, I'd like to insert a quick word on what shielding will and will not do. It WILL block almost all RF interference if done correctly, as we’re in effect forming a Faraday cage around all of the guitar’s internal components. This silences the guitar to a considerable degree…even on humbucker equipped instruments. If you do your job right, you may even disconnect the ground wire to the bridge, as it will serve no purpose anymore. That being said, I usually do leave it connected as a personal preference. There should be no more annoying buzz when you take your fingers off of the strings, and the signal-to-noise ratio will be drastically improved. What shielding WON’T do is remove the 60 cycle hum completely from single coil pickups…that’s just not possible. However there will be a DRASTIC reduction of noise, so this process is, of course, especially effective on Strats and single coil equipped guitars. Also, this process is non-reversible if you use shielding paint, so that's also a consideration on vintage instruments (although Stevie Ray Vaughan had all of his Strats shielded in this manner...so there's an endorsement for you!).
A lot of guitars come from the factory with no shielding at all, or sub-standard work that will not accomplish much of anything. For maximum effectiveness, ALL control cavities, control cavity covers and pickuguards must be uniformly coated with either shielding paint (a special paint that actually conducts electricity) or aluminum/copper foil tape and then connected to ground. The supplies we need are pretty basic. First, we’ll need shielding paint, obviously. I get mine from Stewart MacDonald Guitar Shop Supply (it’s water based, so cleanup is fairly easy). Keep some wet and dry paper towels handy in case you go outside the lines for cleanup. You can find the paint here, or on eBay:
STEWMAC.COM : Conductive Shielding Paint
I have an old roll of aluminum foil tape that I use, but Stew-Mac sells great copper tape here:
STEWMAC.COM : Conductive Copper Tape
You’ll also need a couple of junk paintbrushes to apply the paint, and keep them ONLY for this purpose.
Also, I use a #11 eXacto blade to trim the foil once it’s on the pickguard/control cavity cover.
Here’s a pic of my main shielding tools:
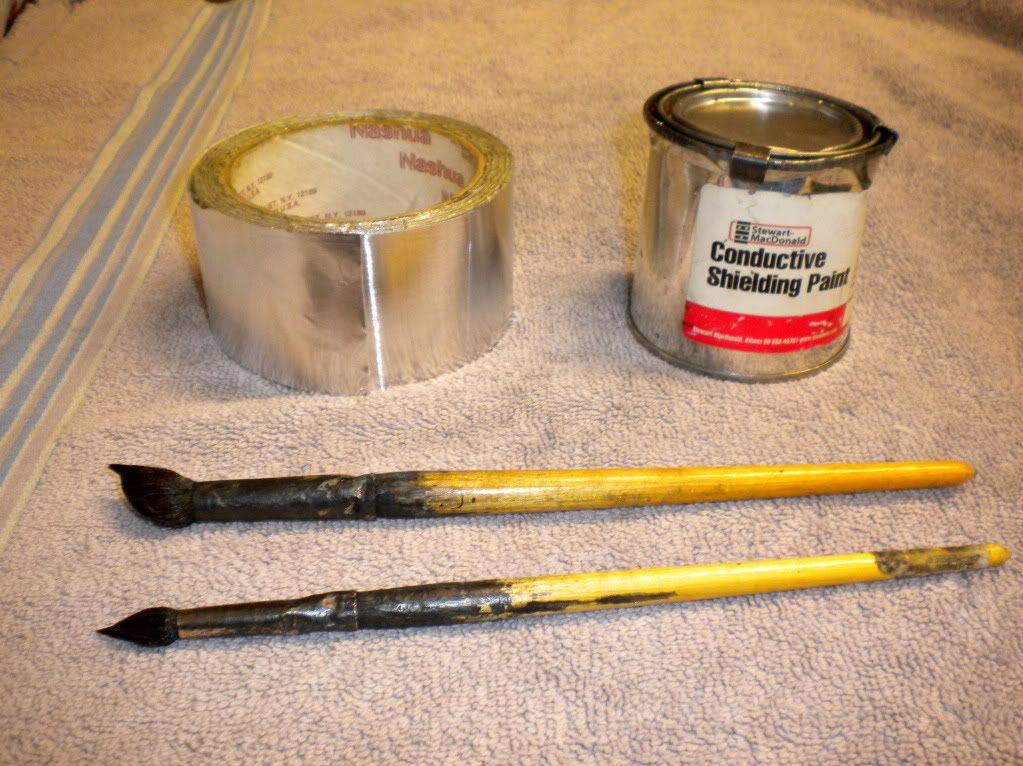
Additionally, you may need ground lugs, wire, drill and short wood screws (I’ll describe when and why you may need these below).
Now, as a rule I ONLY use the foil tape for pickguards and control cavity covers, NOT the cavities themselves, although many people use the foil there too. My issue with doing it that way is that the foil tape can come loose from the cavity walls overt time and short out the guitar. Also, it’s VERY time consuming to cut, paste and solder all of that foil. Although the shielding paint requires two coats and must dry overnight after each coat, the actual labor time involved is under an hour once you get it down.
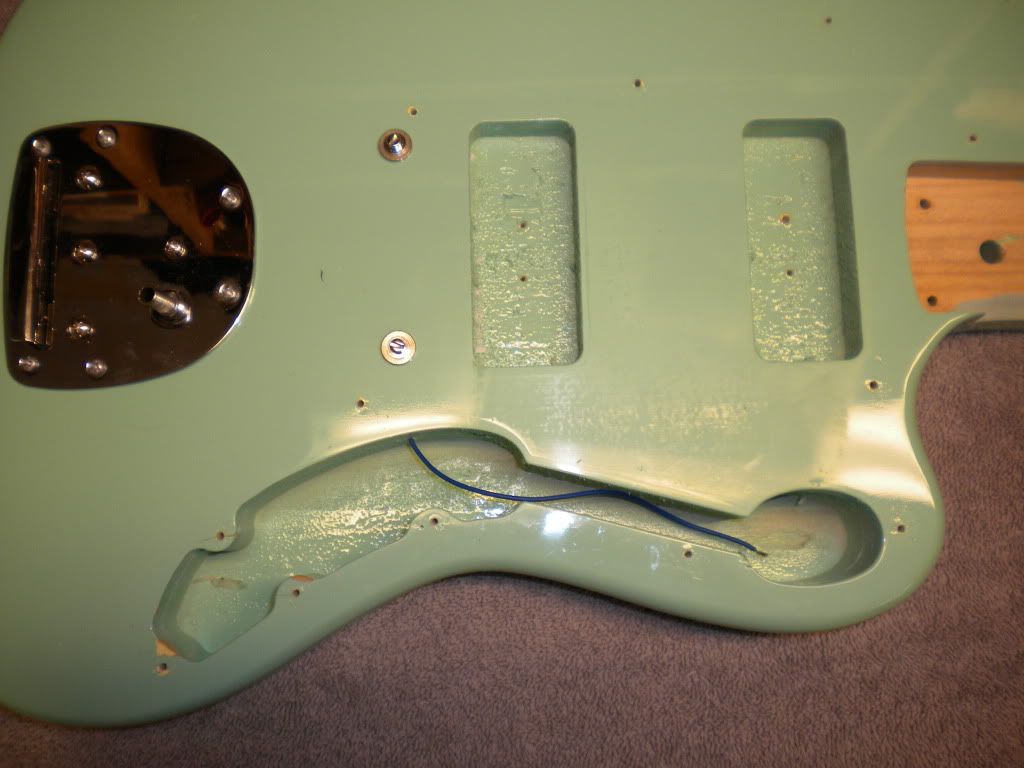
Here’s the body of the subject we’re dealing with today. Note that ABSOLUTELY NO shielding inside the body has been done at the factory. The remaining wire inside is the ground to bridge, which, as I said, I leave in, although you can remove it once the shielding job is complete.
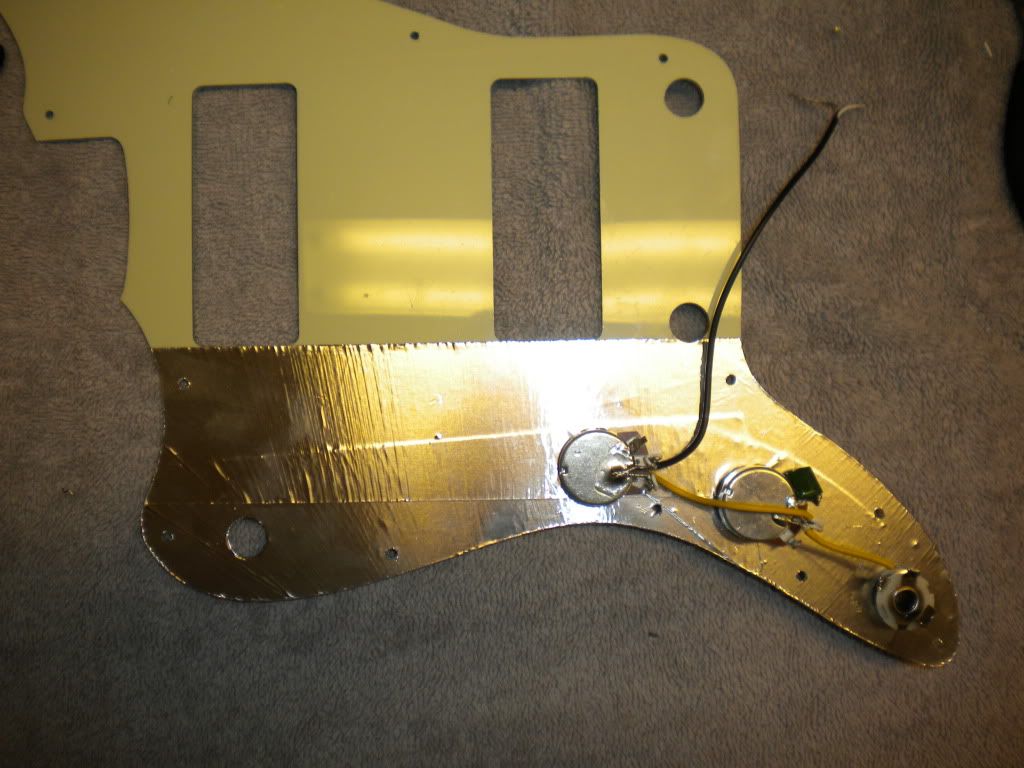
Here’s the pickguard…note the minimal aluminum foil applied to the back of the guard…just enough to cover the components, but NOT the rest of the electronics routing below it - or even the pickup selector switch (already removed here) to the left:

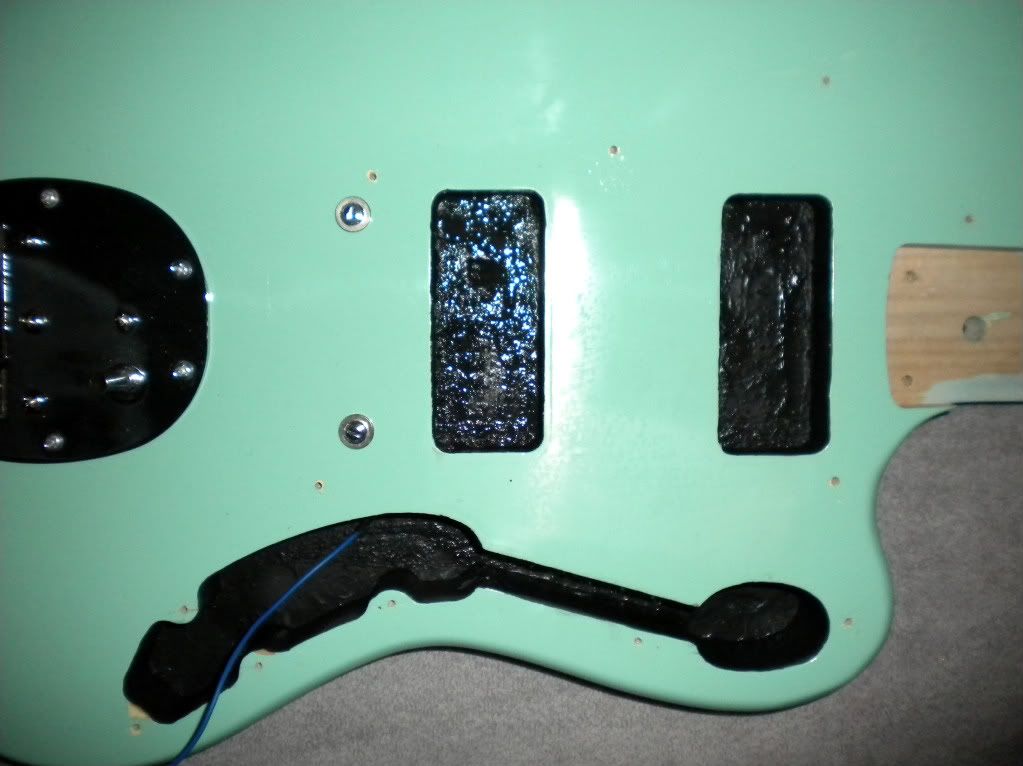
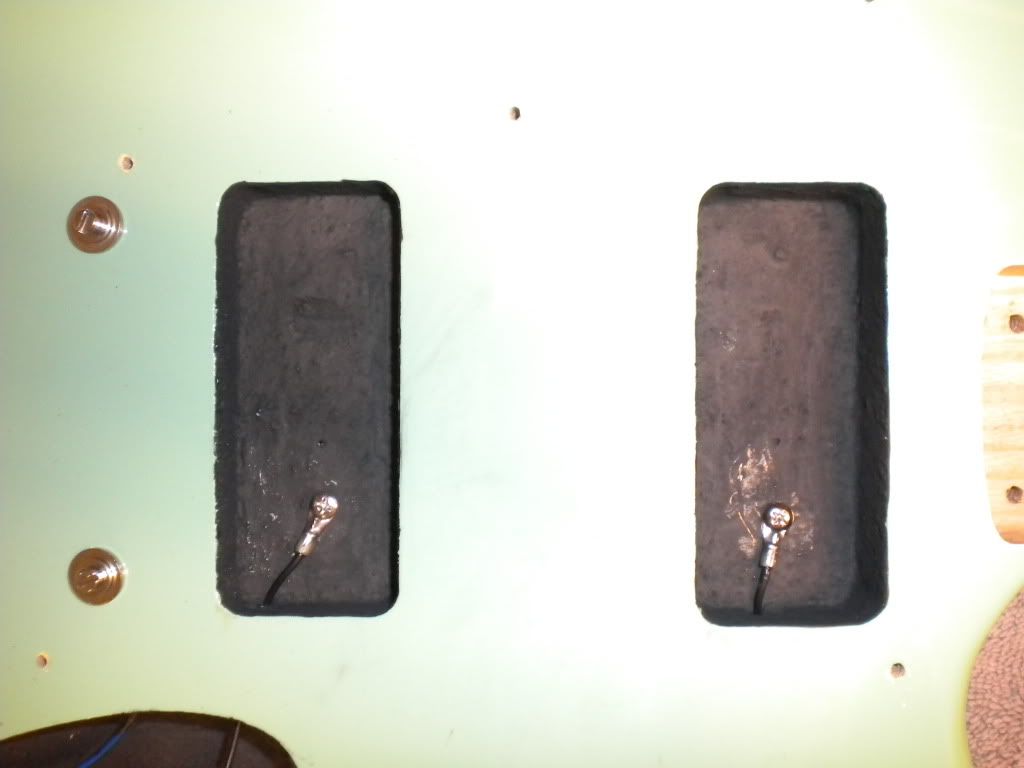
First, I paint the first coat of shielding paint into the guitar body, and ALL cavities (front or back) that contain electronics get shielded. TAKE YOUR TIME AND HAVE PATIENCE!! Neatness counts – especially on something like a J Bass where the back pickup has no pickguard over the rear pickup to cover your mess. Here we are after the first coat while the paint is still wet:
Now on to the pickguard. I am only going to shield the bottom 1/3 or so of this pickguard. The portions of the ‘guard that just lie flat against the body don’t need to be shielded for obvious reasons. We only need to concern ourselves with what goes over the electronics. I lay the guard over a scrap piece of cardboard and apply the tape. Once that’s done, I trim the excess foil tape GENTLY along the edges and all of the holes in the guard with the eXacto blade. Here’s the pickguard with it’s new shielding job (and the sloppy factory lead dress cleaned up considerably):
If you have a Strat or P Bass, complete pickguard shields are readily available online, and you can skip this step entirely. You can find them here:
Pickguard Shield at Guitar Center. | Search Results
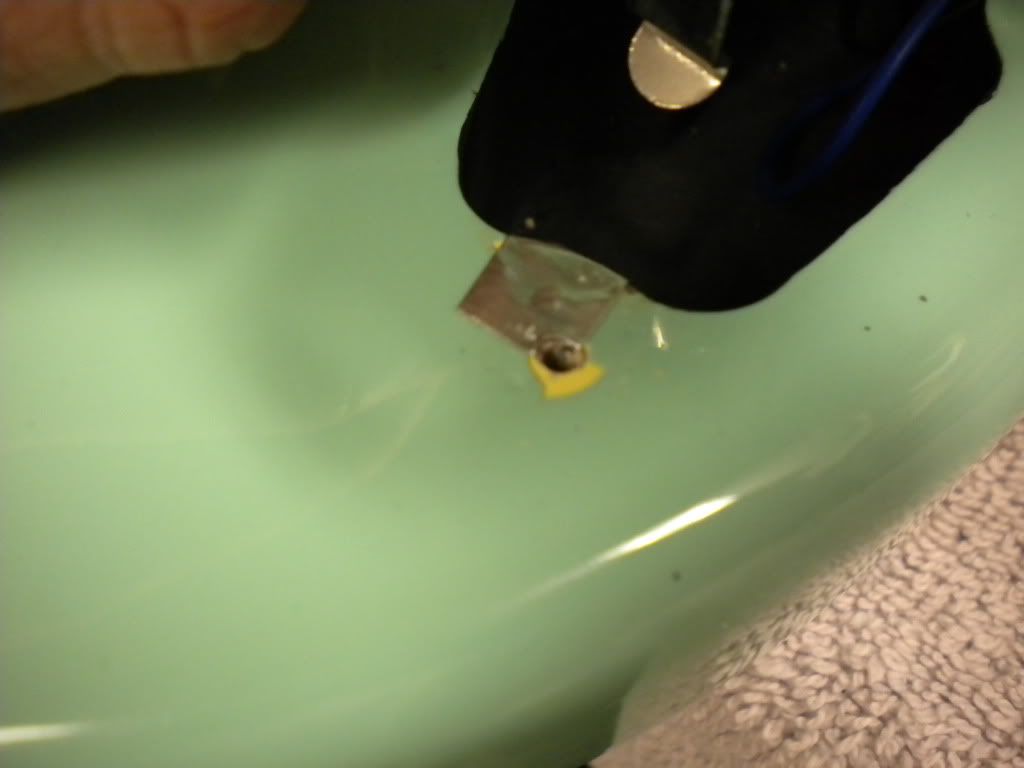
Once the second coat is in and all paint is dry, any cavities not directly connected to the main cavity need to be connected to ground. For example, a typical Strat uses one big rout, so you won’t need this step. Our subject guitar here has two pickup routs that are separate from the main rout, so this guitar will need two of these additional ground wires. For this purpose, I assemble lugs that are crimped AND soldered to new ground wires, and then I screw them into the base of the cavity itself. Finally, I run those wires directly to ground connections on the pots. BE EXTREMELY CAREFUL HERE. If you use screws that are too long, you can go through the back of the guitar with them, so measure carefully and then measure again. Also, drilling pilot holes for these screws is highly recommended. Here’s a picture of this step completed:
Now, the main cavity needs to be connected directly to ground as well. This can be done three ways: 1) Use a grounding lug screwed into the body as we did above, 2) Paint up onto the guitar body’s face with some extra paint in a manner that connects to the pickguard’s foil shield, or 3) take a strip of your foil tape and overlap it onto the guitar’s top where it will contact the pickguard's shielding tape. I usually choose option 3 to save drilling another hole or painting onto the guitar’s face:
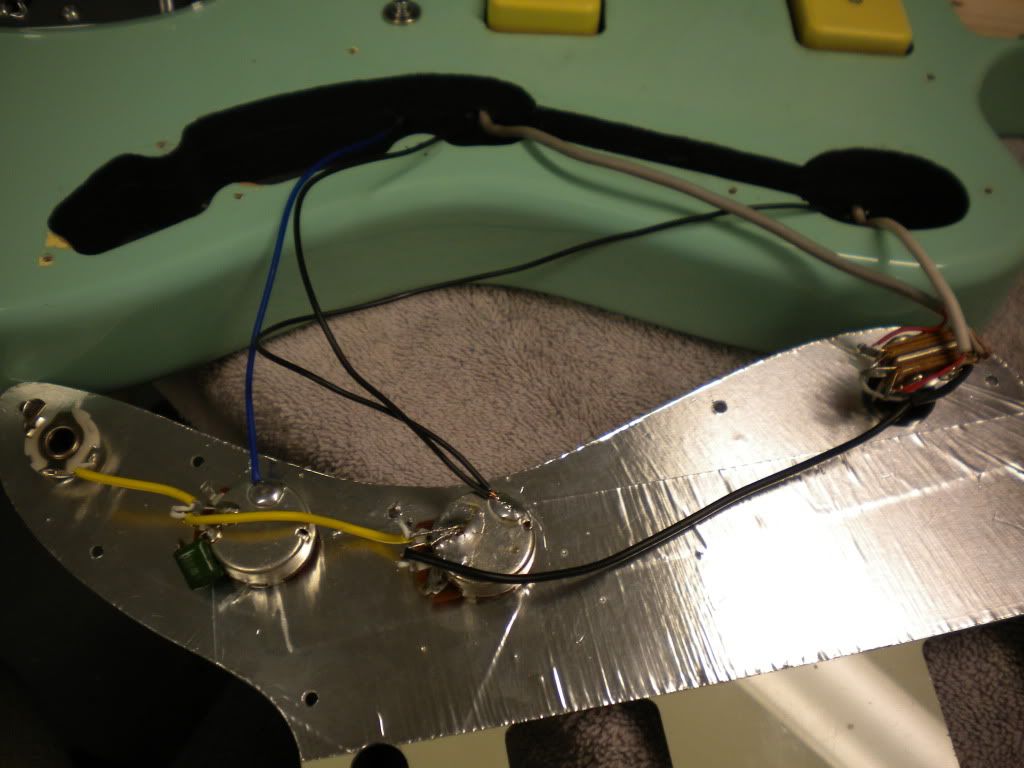
Finally, wire it all together and test fit it all together to make sure nothing’s touching the control cavity walls and shorting out. Plug it in and test all functions and switches to make sure everything works as it should. Here’s this guitar wired up and ready for test fitting:
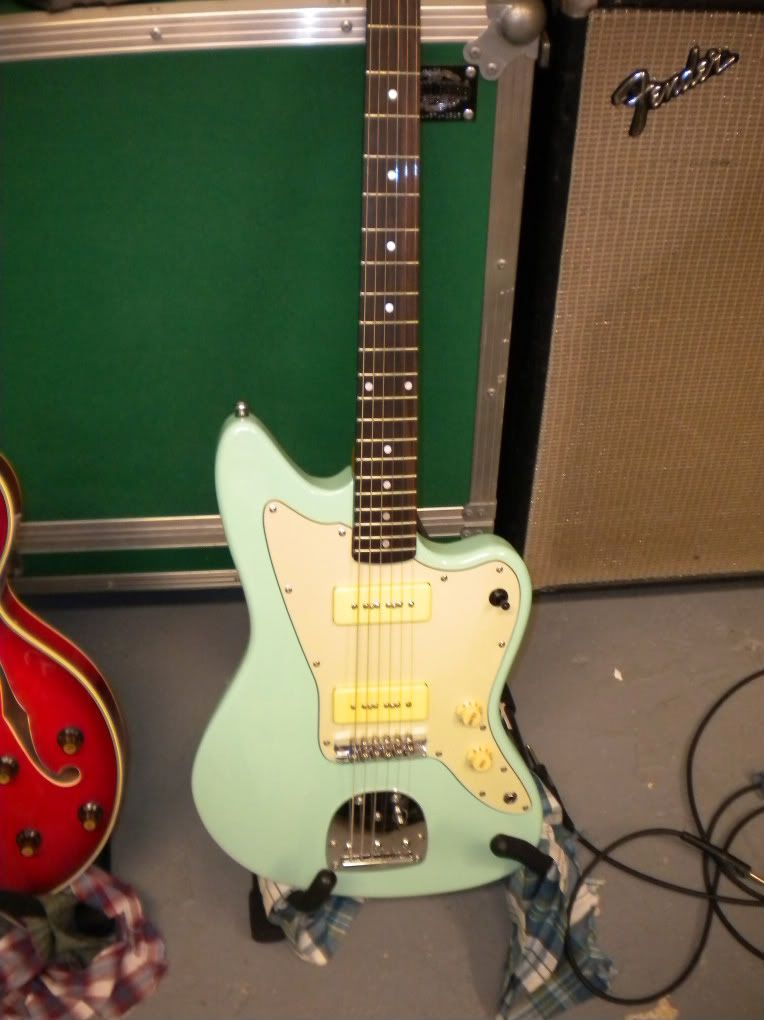
All assembled here. It’s passed all noise tests, wiring tests, and is ready for the neck to be re-attached and it's final set up:

Here we are…all ready to go back to the customer!
Anyway, I hope some of you found this informative, and I invite one and all to share their questions, tips, individual methods, rants, and tricks below. Happy shielding…and, most importantly, HAVE FUN WITH IT!")
-Lane
After seeing several posts about shielding your guitar and the various methods involved (as well as being asked directly to contribute my methods), I thought I’d share a step-by-step detailed analysis of how I perform this job in my shop. My way is NOT the only way to do this job - it’s just the method that I personally use and has worked best for me as I developed it over time. Recently, I was given a noisy mongrel guitar (based on a Fender Jaguar…sort of) that had two AWESOME sounding P-90 pickups in it but was excessively noisy. Time for a shielding job!
For your collective consideration, I'd like to insert a quick word on what shielding will and will not do. It WILL block almost all RF interference if done correctly, as we’re in effect forming a Faraday cage around all of the guitar’s internal components. This silences the guitar to a considerable degree…even on humbucker equipped instruments. If you do your job right, you may even disconnect the ground wire to the bridge, as it will serve no purpose anymore. That being said, I usually do leave it connected as a personal preference. There should be no more annoying buzz when you take your fingers off of the strings, and the signal-to-noise ratio will be drastically improved. What shielding WON’T do is remove the 60 cycle hum completely from single coil pickups…that’s just not possible. However there will be a DRASTIC reduction of noise, so this process is, of course, especially effective on Strats and single coil equipped guitars. Also, this process is non-reversible if you use shielding paint, so that's also a consideration on vintage instruments (although Stevie Ray Vaughan had all of his Strats shielded in this manner...so there's an endorsement for you!).
A lot of guitars come from the factory with no shielding at all, or sub-standard work that will not accomplish much of anything. For maximum effectiveness, ALL control cavities, control cavity covers and pickuguards must be uniformly coated with either shielding paint (a special paint that actually conducts electricity) or aluminum/copper foil tape and then connected to ground. The supplies we need are pretty basic. First, we’ll need shielding paint, obviously. I get mine from Stewart MacDonald Guitar Shop Supply (it’s water based, so cleanup is fairly easy). Keep some wet and dry paper towels handy in case you go outside the lines for cleanup. You can find the paint here, or on eBay:
STEWMAC.COM : Conductive Shielding Paint
I have an old roll of aluminum foil tape that I use, but Stew-Mac sells great copper tape here:
STEWMAC.COM : Conductive Copper Tape
You’ll also need a couple of junk paintbrushes to apply the paint, and keep them ONLY for this purpose.
Also, I use a #11 eXacto blade to trim the foil once it’s on the pickguard/control cavity cover.
Here’s a pic of my main shielding tools:
Additionally, you may need ground lugs, wire, drill and short wood screws (I’ll describe when and why you may need these below).
Now, as a rule I ONLY use the foil tape for pickguards and control cavity covers, NOT the cavities themselves, although many people use the foil there too. My issue with doing it that way is that the foil tape can come loose from the cavity walls overt time and short out the guitar. Also, it’s VERY time consuming to cut, paste and solder all of that foil. Although the shielding paint requires two coats and must dry overnight after each coat, the actual labor time involved is under an hour once you get it down.
Here’s the body of the subject we’re dealing with today. Note that ABSOLUTELY NO shielding inside the body has been done at the factory. The remaining wire inside is the ground to bridge, which, as I said, I leave in, although you can remove it once the shielding job is complete.
Here’s the pickguard…note the minimal aluminum foil applied to the back of the guard…just enough to cover the components, but NOT the rest of the electronics routing below it - or even the pickup selector switch (already removed here) to the left:
First, I paint the first coat of shielding paint into the guitar body, and ALL cavities (front or back) that contain electronics get shielded. TAKE YOUR TIME AND HAVE PATIENCE!! Neatness counts – especially on something like a J Bass where the back pickup has no pickguard over the rear pickup to cover your mess. Here we are after the first coat while the paint is still wet:
Now on to the pickguard. I am only going to shield the bottom 1/3 or so of this pickguard. The portions of the ‘guard that just lie flat against the body don’t need to be shielded for obvious reasons. We only need to concern ourselves with what goes over the electronics. I lay the guard over a scrap piece of cardboard and apply the tape. Once that’s done, I trim the excess foil tape GENTLY along the edges and all of the holes in the guard with the eXacto blade. Here’s the pickguard with it’s new shielding job (and the sloppy factory lead dress cleaned up considerably):
If you have a Strat or P Bass, complete pickguard shields are readily available online, and you can skip this step entirely. You can find them here:
Pickguard Shield at Guitar Center. | Search Results
Once the second coat is in and all paint is dry, any cavities not directly connected to the main cavity need to be connected to ground. For example, a typical Strat uses one big rout, so you won’t need this step. Our subject guitar here has two pickup routs that are separate from the main rout, so this guitar will need two of these additional ground wires. For this purpose, I assemble lugs that are crimped AND soldered to new ground wires, and then I screw them into the base of the cavity itself. Finally, I run those wires directly to ground connections on the pots. BE EXTREMELY CAREFUL HERE. If you use screws that are too long, you can go through the back of the guitar with them, so measure carefully and then measure again. Also, drilling pilot holes for these screws is highly recommended. Here’s a picture of this step completed:
Now, the main cavity needs to be connected directly to ground as well. This can be done three ways: 1) Use a grounding lug screwed into the body as we did above, 2) Paint up onto the guitar body’s face with some extra paint in a manner that connects to the pickguard’s foil shield, or 3) take a strip of your foil tape and overlap it onto the guitar’s top where it will contact the pickguard's shielding tape. I usually choose option 3 to save drilling another hole or painting onto the guitar’s face:
Finally, wire it all together and test fit it all together to make sure nothing’s touching the control cavity walls and shorting out. Plug it in and test all functions and switches to make sure everything works as it should. Here’s this guitar wired up and ready for test fitting:
All assembled here. It’s passed all noise tests, wiring tests, and is ready for the neck to be re-attached and it's final set up:
Here we are…all ready to go back to the customer!
Anyway, I hope some of you found this informative, and I invite one and all to share their questions, tips, individual methods, rants, and tricks below. Happy shielding…and, most importantly, HAVE FUN WITH IT!
-Lane
 Just doing as I was asked.


